Photoshop: How I edit my photos:
Hey all, this post is a more photography inspired post. I love taking images. I take my shots on the Nikon D3400 and I'm obsessed with the quality of the images it produces. After taking a photography course at college, I fell in love with imagery.
So for this post, I have decided to share my editing techniques that I use on Photoshop, nothing overly fancy. Just simple editing skills to help make your images look that little bit more contrasted and vibrant.

First of all, a little context into this image - it was taken in New York. I love the vibrant colours in this image. Before I edited it the colours were not as bright and the contrast wasn't as developed. I first decided to use camera raw filter to increase the contrast and then I lowered the exposure a little. I then made the clarity of the image higher so the details were more exposed.
Here is a screenshot of the some of the editing:

This next image was taken in Puerto De La Cruz, in Tenerife. The before picture looks nothing like this final piece. The oranges in this image stand out so well due to increasing the contrast and the clarity.

I love how the sunset has reflected against the water. With the choppy waves in the background, this is edited in a similar way to the previous image but here I turned the exposure down so that the sunset can be seen clearer.
Here is the before image:

This one is one of my personal favourite pictures, I think it's because of the abstract graffiti colours and presentation. Within this image I decided to edit it by deepening the contrast and vibrant features of the image.
I also used the camera raw filter method again, within the adobe software. This upped the clarity of the image so that the details within the paint came out more through the editing.


I often capture images when I'm travelling, I love the idea of being up in the air and getting images of the clouds and knowing the world is beneath me. I took this image on my phone so the quality isn't as good but the editing makes the image much better.

I love the vintage feel to the image mainly due to the black dots in the right corner. I heightened the contrast in the plane image, as I wanted the blues to be more visible within the image. I also used clarity within Photoshop to make the clouds look more defined.

Oh how beautiful she is, the statue of Liberty was one of the best sights to capture, she's magnificent and I never expected to be so up close and personal with her. My camera really did make these images of her look even more defined and clear.
On this edit, I decided to add clarity to the image so that she was even more defined, also I cropped the original image which was her body in full not just half of her, I did this so I could zoom in on the facial features, cropping is such an easy yet good tool to work with.

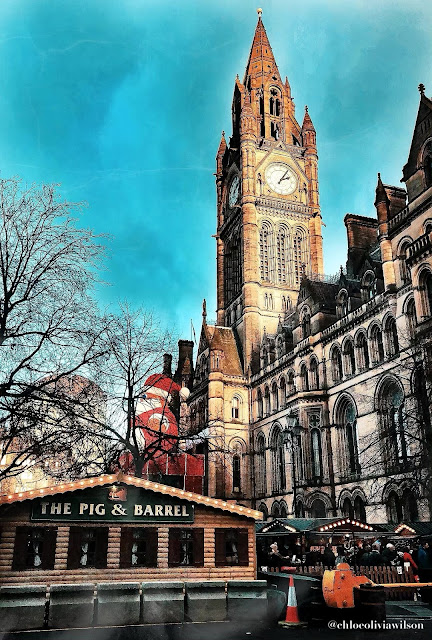
This is by far my most favourite photograph that I have captured. I love how it is positioned in frame and I think the editing has made the image more clear and crisp and has made me love it even more. With this one I decided to make the image more clear but darker as I feel like this emphasises the detail in the wheel - compared with the whites and blues of the sky. I did this by increasing the contrast and clarity and reducing the exposure ever so slightly.
SO, anyway, this is how I edit my pics. I use Photoshop and basically play around with the contrast, brightness, clarity, colours and exposure.
I hope this helps with your editing. I mean, I'm defo not an expert but I hope that it can help you edit your pics quick and easily.
Stay tuned for a photo diary soon!
Chloe x


Comments
Post a Comment